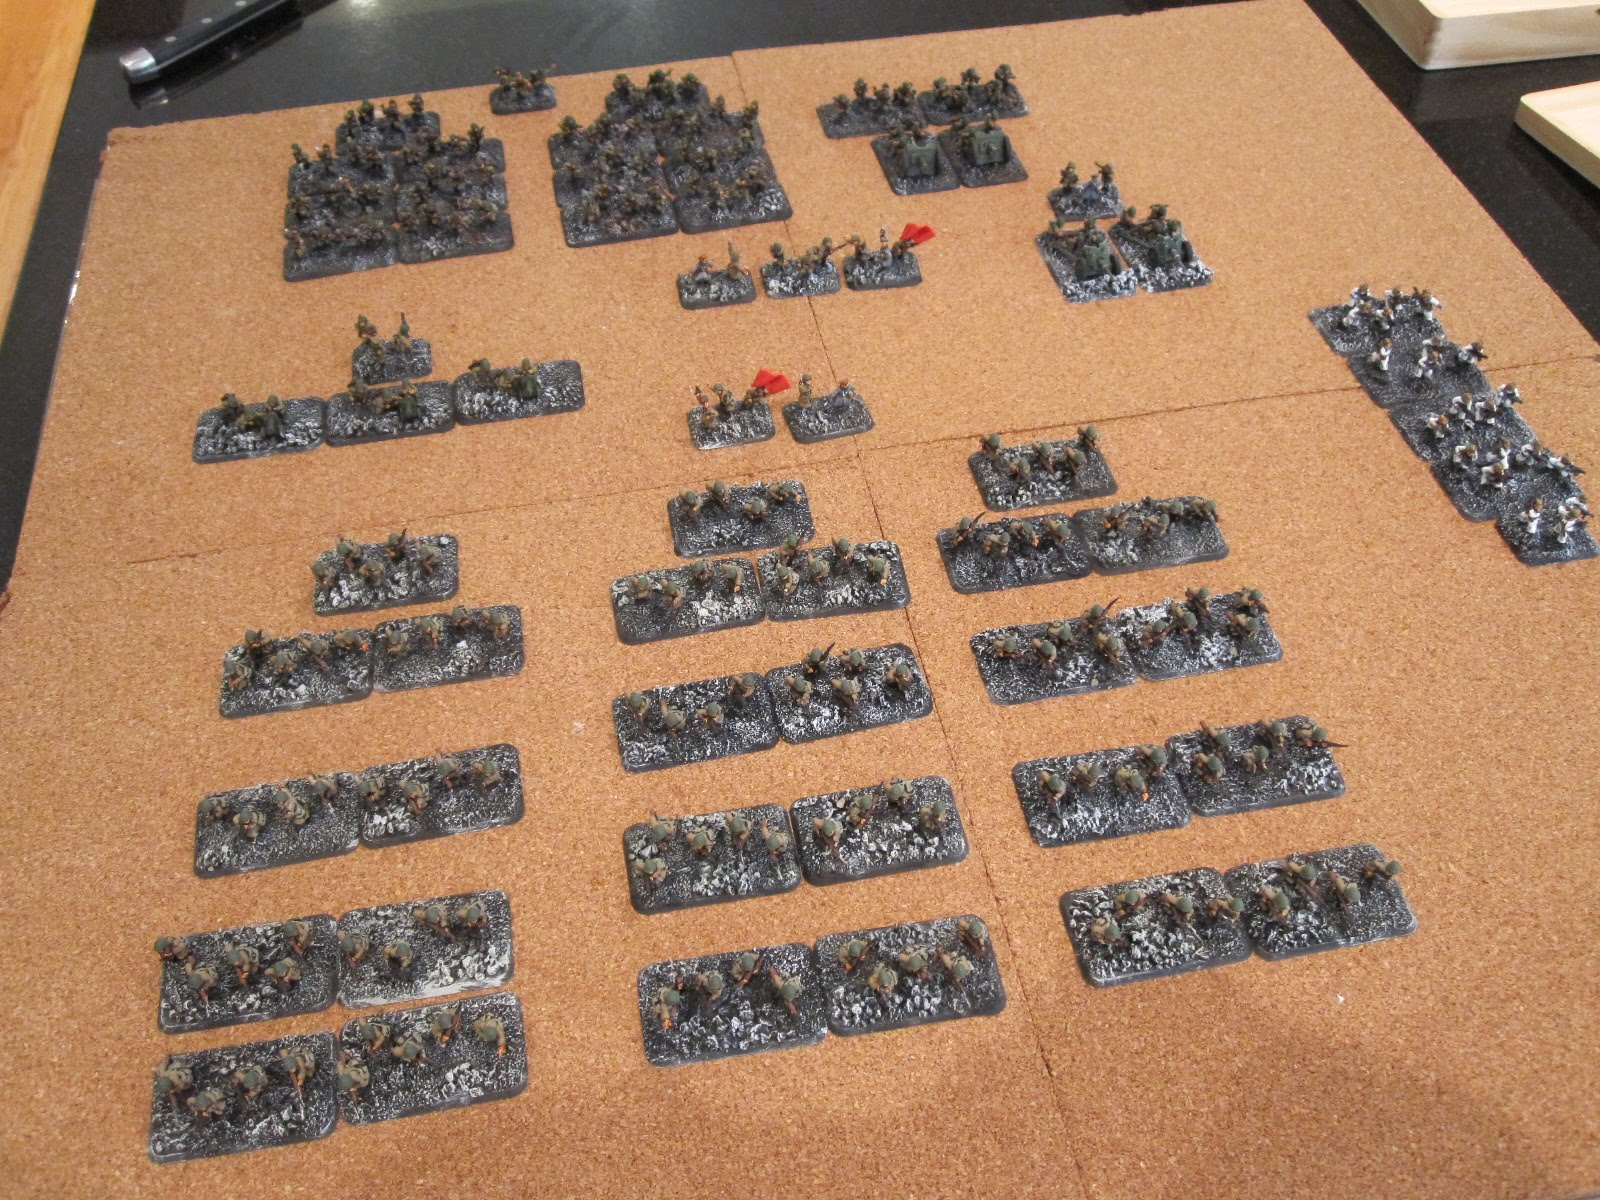

The Battle of Stokes Green, initial positions.

Bluebear commented in the last post that it was the anniversary of the ECW Battle of Cropredy Bridge that occurred June 29th, 366 years ago and that it might be interesting to commemorate by re-posting a battle I posted back in '09 loosely based on Cropredy. A capital idea so here it is!...:
News of another battle that took place yesterday, (May 22, 1642) on nearby Stokes Green between a Royalist force led by a somewhat cautious CinC but this time supported by a brigade of Scots (...though flying Covenant colors, for this game they are doing service for the King)... against a roughly equal strength Parliamentary army that, though ably led, was lacking in powder and shot.
The scenario was a rough approximation of the historic battle of Cropredy Bridge where the armies had been marching parallel routes in view of each other across a small river with fords and bridges at several points. Seeing the Royalist van becoming separated from the main body, the more aggressive Parliamentary commander makes the first move by rapidly crossing the river to assault the Royalist main body while simultaneously sending a brigade across another ford to fall upon the Royalist rearguard.

Here the Parliamentary force forms up for the attack...the brigade in the far distance is the force moving against the Royalist rearguard.

The Royalist main body posted on a low ridge...its left anchored near a small tavern (locally known as the the "Blue Bear")...in the foreground is the wide expanse of Stokesgreen.

A view of the Royalist main body posted on the ridge, a large body of Royalist horse move down a lane past The Blue Bear tavern. In the middle distance is Tidders Farm where Roundhead Dragoons mount a strong defense, and farther on, the Old Mill can be seen.

The Royalist rearguard commanded by a somewhat reckless brigadier who early in the fight decided to leave his strong defensive position to attack the Roundheads hoping to catch them as they ford the stream.

A more cautious Royalist CinC sits and waits for the Parliamentary attack...as the guns begin to thunder, he does not realize his final minutes are numbered...

The Tower Hamlets regiment fording the stream in the attack on the rearguard.

Colonel Okey's dragoons move to occupy Tidders' farm. (the first game appearance of my "pinecone trees")

...being a spring day in May, a surprise cloudburst slowed the battle for 15 minutes.
(I use event tokens made of 20x 40 bases from "Gale Force Nine" instead of the event roll that the "Victory Without Quarter" Rules use. I just made tokens for each result and added a few of my own to make an "event cup" that is drawn from whenever the "Event" card comes up in the initiative card draw.)
(I use event tokens made of 20x 40 bases from "Gale Force Nine" instead of the event roll that the "Victory Without Quarter" Rules use. I just made tokens for each result and added a few of my own to make an "event cup" that is drawn from whenever the "Event" card comes up in the initiative card draw.)

The Scots in the Royalist advance guard hurry back down their line of march to reach the battle.

First clash the Royalist rear, the reckless subordinate quits the secure ridge position in a bid to press the Roundheads back to the ford... and the move almost succeeds....the Parliamentary brigadier is captured in the cavalry melee leaving the Parliamentary attack on the rear leaderless and losing momentum.

Artillery of both sides starts to bombard...and unfortunately for the Royalists, their CinC is struck by a stray ball and killed early in the fight leaving the Royalist center leaderless for a time.

Col. Okey's Dragoons establish a defensible position in Tidders' farmyard.


Parliamentary horse led by their brilliant brigadier, Major General Fitzalte a veteran of many years on the continent who has come to England seeking more glory (or plunder) commanding the Parliamentary horse. They are faced across the green by a large body of Royalist horse plus the Scottish horse. (note General Fitzalte's rating token as "brilliant" allowing him to issue 2 orders when his initiative card is drawn). The General's brigade of horse defeat the leading troop of Royalist horse in a furious melee and pursue into the following troop but are eventually to scattered to make a second charge and ultimately are defeated.

After blasting away the head of the Parlaimentary foot advancing on the rear guard, Royalist foot discharge a volley against the Tower Hamlets Regiment

In the center, Parliamentary hopes are dashed as Royalist foot stoutly resists attacks on the center and rear. The shortage of ammunition (simulated by a 3 "full volley" limit on some of the Parlaimentary foot units was a facotr in thr final stages of the battle when the major engagemants of foot units were being decided.
(I also used a new approach to event cards....if a "reinforcements" token is drawn, the side that draws the next initiative card gets any unit that has been destroyed as reinforcements...thus making things a bit more interesting...the Royalists drew the first getting a "destroyed" horse unit ressurected on their table edge. Though they did not get engaged in the battle before it ended it sealed Parliamentary chances for a win.)
(I also used a new approach to event cards....if a "reinforcements" token is drawn, the side that draws the next initiative card gets any unit that has been destroyed as reinforcements...thus making things a bit more interesting...the Royalists drew the first getting a "destroyed" horse unit ressurected on their table edge. Though they did not get engaged in the battle before it ended it sealed Parliamentary chances for a win.)

Strongly ensconced in the outbuildings of Tidder's Farm, Okey's Dragoons turn back a furious charge by Newcastle's whitecoats, but it is ultimately to no avail as the Parliamentary assault is dashed against a strong Royalist position.

The battle is finally decided in the center when the Parliamentary horse and foot are finally overwhelmed by the sheer weight of shot and horseflesh laid on by the Royalists...further strengthened by a reinforcing body of Royalist horse arriving in the vicinity of Captain William's Barn. The Scots finally make a late a late bid to take the Parliamentary horse in the rear to seal the deal. (I used a sudden death rule "liberated" from the WWII Flames of War Rules: i.e: if an army has more units routed or eliminated than are still fighting on the table they are defeated.)
Thus the battle ended after two and a half hours of scale combat, (and interestingly 2 1/2 hours of real time as well...) in a sound victory for the Royalists!
(...as always I found the "Victory Without Quarter" rules excellent for solo play)